
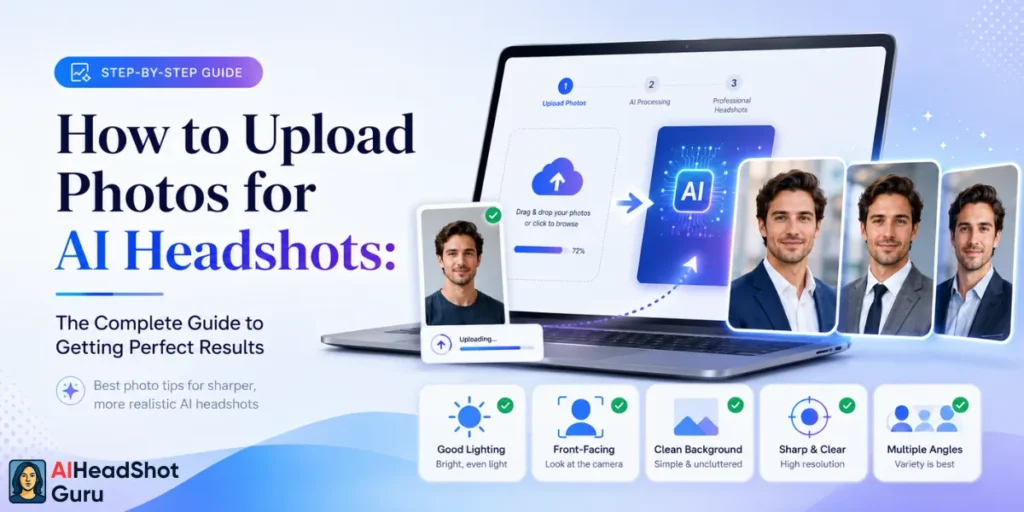
If your AI headshots keep coming out plastic, warped, or “not quite you,” the tool usually isn't the villain — your upload set is.
This guide shows you exactly how to upload photos for AI headshots so you pull clean, professional results without torching your credits on re-runs.
You'll get the photo count that actually works, the lighting that flatters, the angles the model needs, what to wear, and the upload mistakes that instantly ruin outputs. It applies to every serious AI headshot generator.
Best Photo Settings for AI Headshots (Quick Reference)
| Setting / Factor | Recommended Setup for AI Headshots |
|---|---|
| Number of photos | 6–20 solo photos, minimum 6–8 clear shots |
| Photo resolution | At least 1024×1024 or full-size smartphone files |
| Lighting | Soft natural light near a window; no harsh shadows or backlight |
| Angles | Front, slight left, slight right; small variations only |
| Expressions | Neutral, slight smile, professional smile; nothing exaggerated |
| Backgrounds | Plain walls or uncluttered rooms; skip busy or crowded scenes |
| Clothes | Solid colors, business or clean casual; no loud prints or big logos |
| Device | Modern smartphone or DSLR; upload original (uncompressed) files |
Why Input Photos Make or Break Your AI Headshots
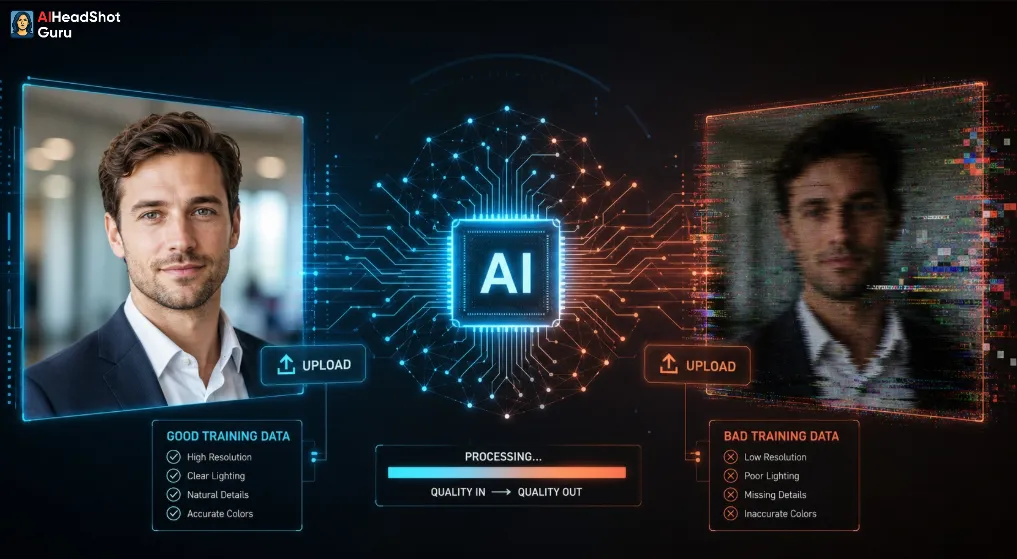
Most AI headshot generators train a tiny model on your face using only the images you upload. Feed it dark, blurry, or heavily edited shots and it learns the wrong version of you, then starts guessing — that's where the strange eyes, melted hair, and waxy skin come from.
Treat your upload set as training data. The cleaner, more consistent, and more realistic your photos, the easier it is for the AI to produce sharp portraits that match your real face. That single idea is the foundation everything below builds on.
How Many Photos to Upload for AI Headshots?
Before you dump 50 selfies into the tool, aim for the sweet spot instead of overloading it. Variety carries far more weight than raw quantity.
A simple set that consistently works:
- 3–5 straight-on photos (neutral and slight smile)
- 3–5 slight-angle photos (left and right)
- 1–3 extras with a different outfit or background
If the first batch disappoints, the fix is usually better uploads, not more random ones.
Lighting Tips: Stop Letting Bad Light Ruin Your Results
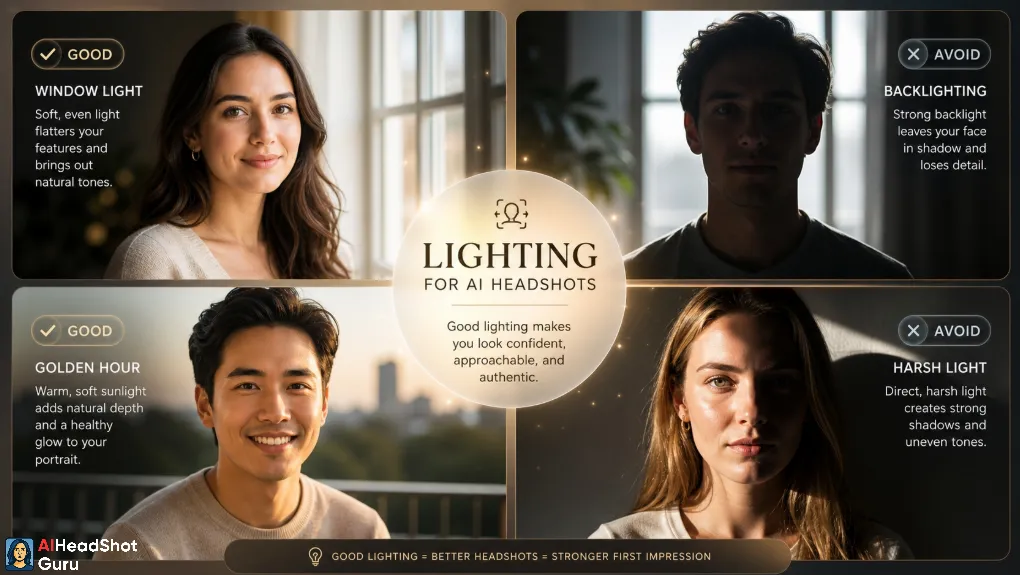
If your face is dark, backlit, or buried in shadow, no model can invent the missing detail. Good light is non-negotiable here.
Do this:
Skip this:
Quick test: snap one selfie. If your skin tone reads natural and your features show clearly without hard shadows, you're in the zone.
Best Angles and Framing for Your Uploads
Your angles shouldn't look like a TikTok experiment. The AI rewards consistency, not wild extremes.
Best angles to upload:
For framing, your face and shoulders should fill most of the frame with a little headroom above. Avoid extreme close-ups that crop half your face and full-body shots where your face shrinks to a dot. Picture LinkedIn framing, not a vacation group pic where you're in the back.
Expressions: What Works and What Breaks AI Headshots
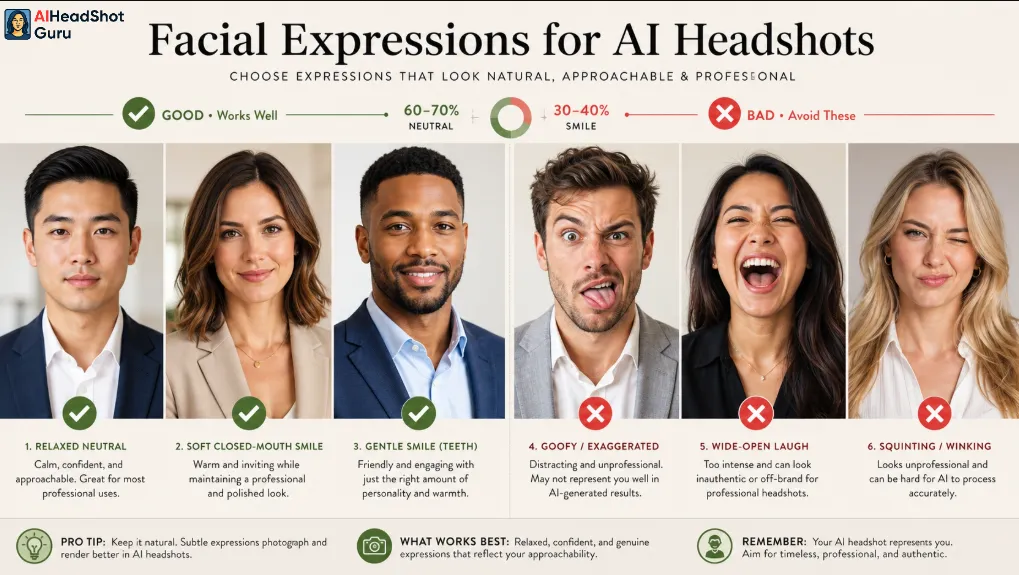
Generators love variety inside a professional range. Give them options without going theatrical.
A reliable mix is 60–70% neutral or slight smiles and 30–40% relaxed professional smiles. That ratio hands the model enough range to generate realistic expressions instead of frozen, cartoonish faces.
✅ Good: relaxed neutral, closed-mouth smile, soft smile with a hint of teeth
❌ Bad: goofy faces, wide-open-mouth shots, squints, winks, duck face
What to Wear for AI Headshot Photos
Wardrobe shapes how your headshots read. Upload everything in a neon hoodie and the model assumes that's your professional default.
Best outfits for input photos:
Outfits to skip:
Chasing LinkedIn or corporate profiles? Lean formal. Building a creator or influencer brand? Stay clean but slightly more relaxed.
Backgrounds: Keep the Focus on Your Face
Even when the platform swaps your background later, the original still matters. Busy scenes confuse the model and steal attention from your features.
Aim for a plain wall (white, beige, grey), a lightly textured but tidy room, or a simple outdoor scene with a blurred backdrop.
Steer clear of crowded streets, messy rooms, multicolored walls, and any random people lurking near your face. You don't need a studio — one clean wall used across most shots does the job.
Phone vs Camera: Does Gear Matter?
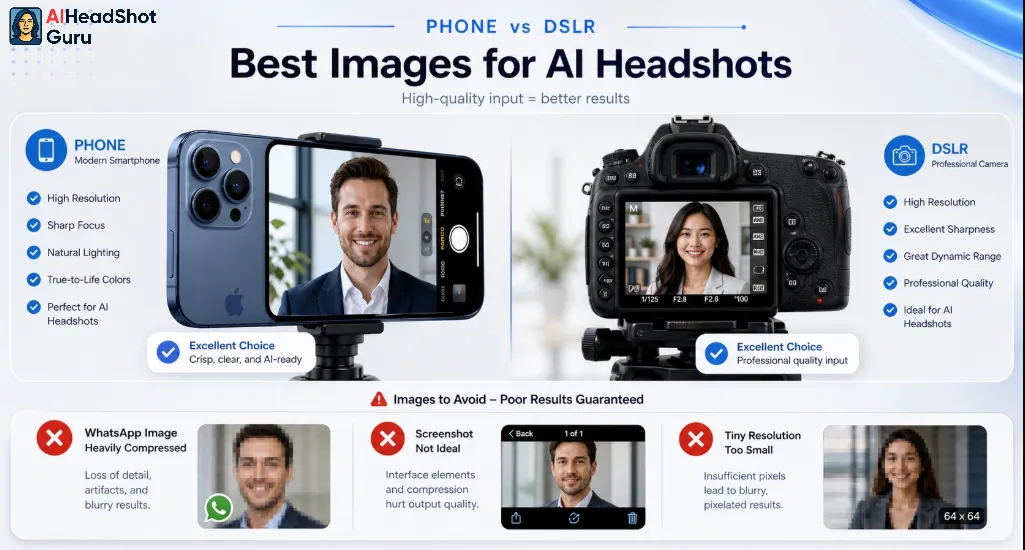
Good news: a DSLR is optional. A recent smartphone is more than enough for sharp AI headshot uploads.
For the cleanest input photos, use the rear camera when you can (a friend or tripod helps), and switch off beauty, portrait, and skin-smoothing filters. The real quality killers are sneaky:
If a photo stays crisp when you zoom in and your facial detail holds up, the AI has what it needs.
Photos You Should Never Upload
Here's the part most people ignore, and it's exactly why their results look off. These almost always produce broken or inconsistent output:
Every obstructed or over-edited photo feeds the model bad data, and it echoes that mess straight into your final headshots.
Keeping Your Look Consistent Across Uploads
One of the fastest ways to wreck a session is mixing wildly different versions of yourself in a single batch.
Avoid combining long hair and a buzzcut, black hair and platinum, or clean-shaven and full-beard shots in the same set.
Instead, pull photos from the same general period with a consistent haircut, hair color, and facial hair. If you wear glasses daily, include a few shots with them and a few without — pick a lane and stick to it for most of the batch.
Step-by-Step: Upload Photos for AI Headshots
This flow works across BetterPic, HeadshotPro, Aragon, and similar tools.
- Pick your goal — LinkedIn, corporate bio, dating app, or creator brand. This decides clothing and vibe.
- Gather 10–15 recent photos — clear, solo, from the last 1–2 years that look like you now.
- Filter ruthlessly — delete anything with filters, sunglasses, harsh shadows, other people, or blur.
- Check light and angles — keep soft-lit, front or slight-angle shots with natural head positions.
- Upload original files — straight from your camera roll, never the compressed social version.
- Run your first session — pick the styles or outfits offered and generate.
- Audit honestly — if results look fake, improve the upload set instead of retrying the same weak photos.
Save 10% on BetterPic AI Headshots Today
Ready to turn your uploaded photos into professional AI headshots? Use BetterPic coupon code AFFMAVEN at checkout to save 10% on your order.
Use Code 🎁
Final Checklist Before You Click Upload
Run this in ten seconds before hitting generate:
Tick every box and your odds of landing sharp, realistic headshots jump immediately.
FAQs
How many photos should I upload for AI headshots?
Most tools work best with 6–20 photos. Aim for 8–15 good, varied shots instead of dozens of near-identical selfies — quality beats quantity every time.
Can I use selfies for AI headshots?
Yes, as long as they're sharp, well-lit, and unfiltered. Use the rear camera or a tripod for cleaner detail, and skip selfies shot in dark rooms or with beauty filters cranked on.
Do I need a professional camera?
No. A recent smartphone is plenty. The real levers are good lighting, sharp focus, and original high-resolution files — fancy gear can't rescue bad light.
Is it okay to upload photos with glasses?
Yes. If you wear them daily, include a few shots with glasses and a few without, and avoid lenses with heavy glare hiding your eyes.
What should I wear for AI headshot photos?
Solid, simple outfits that match your goal. For LinkedIn, think business casual or a clean shirt with or without a blazer, and avoid big logos and loud patterns.
Final Thoughts: Nail the Uploads, Nail the Headshots
When your AI portraits look off, fix the inputs first. Clean lighting, simple backgrounds, a consistent look, and a smart mix of angles and expressions give every platform — BetterPic, InstaHeadshots, Aragon, HeadshotPro, and beyond — exactly what it needs to hand back sharp, realistic results that actually look like you.
Want a personalized upload checklist? Tell me the headshot goal you're chasing — LinkedIn, dating apps, or a creator brand — and I'll tailor one to that exact use case.